Date |
Event |
Time Used |
$$$ |
| 5-May-01 |
Scrub the hull with a
Scotchbrite pad, rinse and then sand.
Apply the first coat of yellow to the hull, sides, and blades. |
3 |
|
| 5-May-01 |
Start work on the spars and
running rigging. Use a variation of a technique I heard on the Laser ListServe to
attach rope loops instead of the eyebolts the plans call for to hold the blocks to the
boom. I will use shackles to attach the blocks to the boom.
 | Drill a hole in the boom the size of the
bolt that you are going to use plus a bit |
| Take some string and insert a sizable loop
of string into the hole. |
| Use wiring fish tape, or a wire with a hook
on the end to grab the loop. Pull the loop out of the end of the tube. |
| Tape the bolt to the string so that as you
pull the string back through the hole, the bolt comes too. |
| Use pliers to hold the bolt while you thread
on the nut on the outside. Use a nylock nut, or a lock-washer to make sure it
doesn't loosen. |
| Cut the bolt off to size. |
Use my hole saw to drill out plugs for the
ends of the mast and spars. Attach an eye-bolt to one of the plugs and bend it 90�
to attach the halyard block. |
2 |
|
| 6-May-01 |
Lightly sand the hull and
blades and apply second coat of yellow. Apply 1 coat of epoxy to outside of tube
plugs.
Stop off at B&L Farm Services (Chesley) and Canadian Tire for running rigging hardware |
1.5 |
9.31 |
| 7-May-01 |
Another day, another sanding,
another coat of paint, another trip to Welbeck for bits and pieces that I need.
Spend 3/4hour finishing off the boom, putting on a rope loop for the gooseneck, putting
acorn nuts over the exposed bolt ends, and putting a wooden cap on each end with a couple
of screws to hold them in place. The rear end also got an eye-bolt that I will use
as an out-haul tie-down. The boom was also cut down to 10' 8" as per the plans. |
1.25 |
2.44 |
| 8-May-01 |
Another day, another sanding,
another coat of paint. Coat # 4. A primer over the epoxy might have been a
good idea. I can still see some of the brown of the wood through the paint. |
.5 |
|
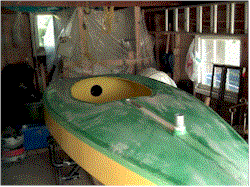
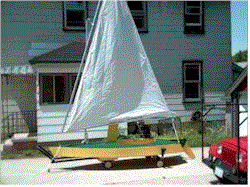
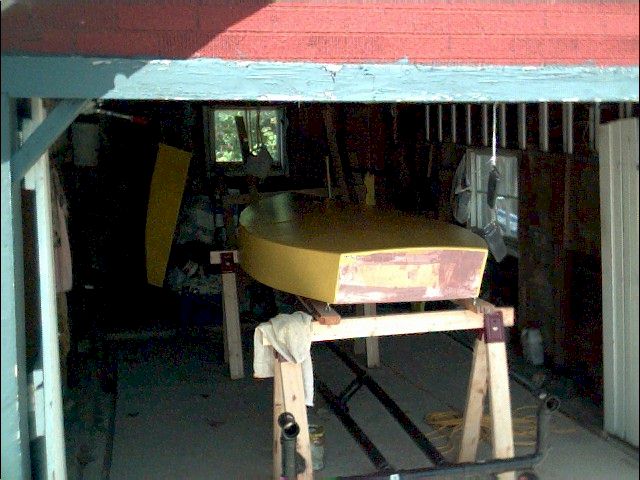
9-May-01
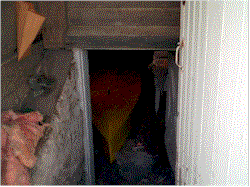
Will it fit?
Safe in the garage |
With the help of my 77 year
old neighber, I moved the MiniCup from the basement to the garage. Due to it being
slightly damp, and most of all, cool, it was taking forever for the paint to dry. After moving the boat, I applied another coat of
paint, taking special care around the scratches that were incurred while moving the boat. |
2 |
|
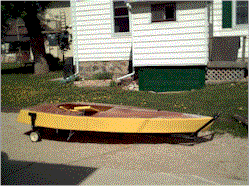
| 10-May-01 |
Another day, another sanding,
another coat of paint. Coat # 6. Almost done now - The blades need a bit more
and the scrapes from the move certainly need some more. I may use a brush for those.
Stop off at Home Depot and pick up a tarp for a sail (White - I can't find a green
one I like), some non-skid sand, and some lines. Finally find a 3" U-Bolt at
Glenbriar Home Hardware. Now I just need to figure out how to attach it so that it
will be solid enough for my liking. |
.5 |
70.13 |
| 16-May-01 |
Use a brush to add more paint
to where the scuffs were as well as along the edges. Think hard that the next time
that I paint with a light colour that I'll use a primer. Also to allow lots of time
for the paint to dry when it's cool out. |
.5 |
|
19-May-01
Adventures in the outdoors |
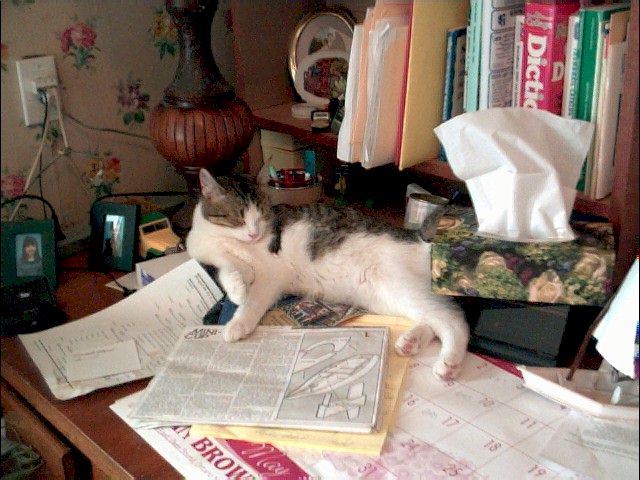
Scrub and sand the deck and
cockpit. |
.5 |
|
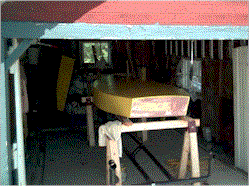
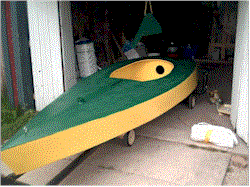
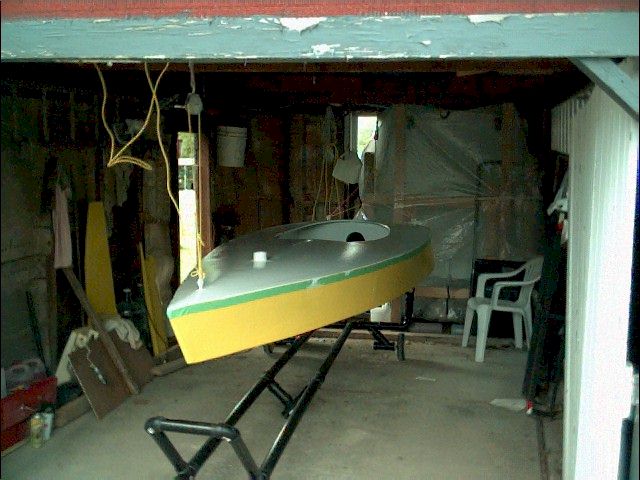
20-May-01
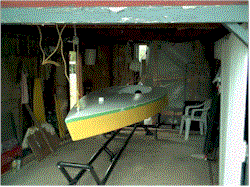
The Mystical Hovering Boat |
Pick up a can of primer paint
at Treshers Home Hardware, move the boat back into the garage and hoist it from the
rafters. Paint the deck and inside of cockpit with primer. The hoisting is so that I can
patch parts of the hull where the paint was scraped off and to do some more work on the
dolly. |
2.25 |
12.06 |
| 27-May-01 |
After a week of rain, spend a
bit of time attaching plugs to the ends of the gaff and drilling and mounting the U-bolt
that attaches the boom to the gaff. |
.5 |
|
| 28-May-01 |
Still raining - attach the
hardware to the mast, and plug both ends. For my halyard block, I bent an eye-bolt
90� and ran it through the mast top plug. All plugs are secured with 1/2"
screws through the side of the tube. |
1 |
|
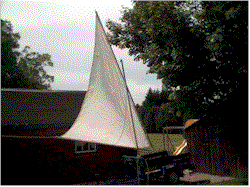
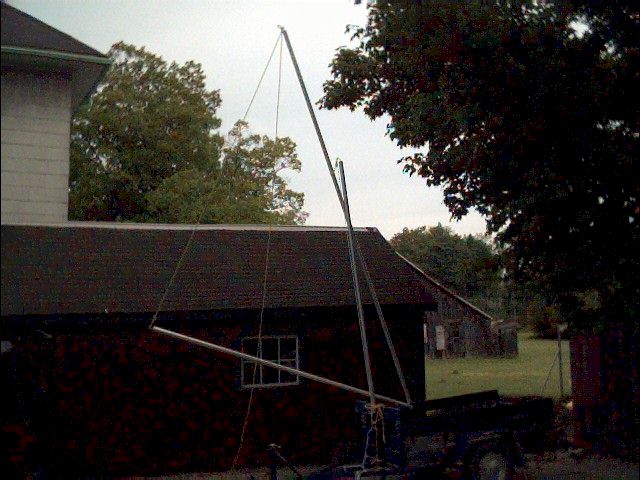
2-Jun-01
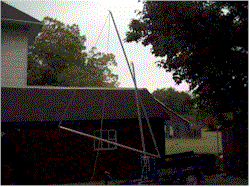
I don't think this will float |
Still raining. I got a
bit of clear sky in the early morning, so I set up my standing rigging for a test.
Looks nice. My modified gooseneck and halyard block seem to work well. I also
took the time to scrup the oil off of the spars that they were coated in when I bought
them with a Scotchbrite pad. The spars were then disassembled and stored in my
garage rafters. |
.5 |
|
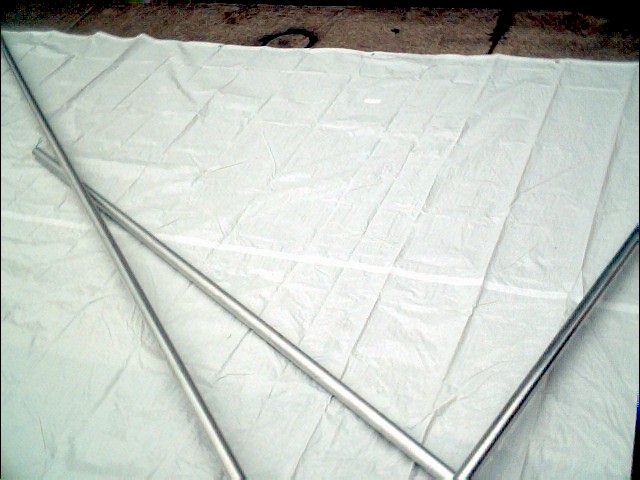
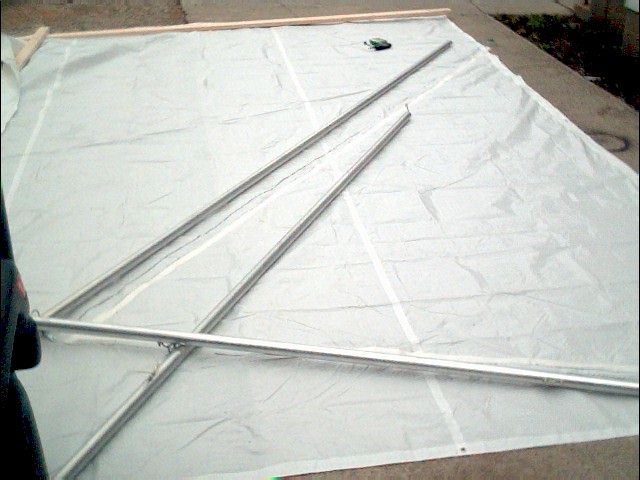
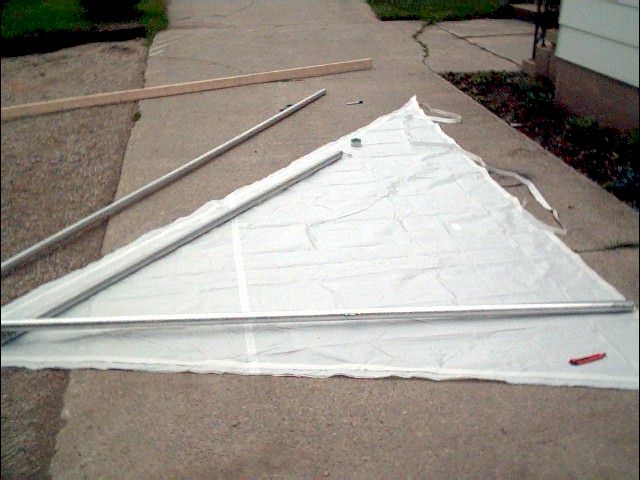
4-Jun-01
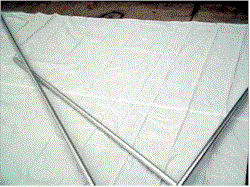
Lay out the tarp and spars
Tape the inside seams
Cut the tarp, leaving space for folding over the tape. I later trimmed this excess
off
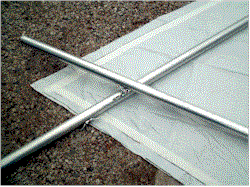
Gooseneck Details |
Not actively raining, but
still cool and damp.
Start making the sail. I've decided to at least as a first sail, to make it with
grommets and lace it on. The main reason for this is so that I can pack my sail
separately and it just feels moe solid.
| Lay my 15' X 20' tarp out on the drive and
set up the mast and spars on top. |
| Trace the inside and outside of the spars. |
| Run double-sided carpet tape along the line
that marks the inside of the spars. |
| Verify that the width of the spars is
roughly the width of the tape and trim the tarp along that line. |
| Run carpet tape along the outer edge of the
tarp as well and trim off the factor finished edge and grommets. |
| Go inside since it looks like rain. I
will fold over the tarp inside as well to avoid getting sand and dirt on the tape. |
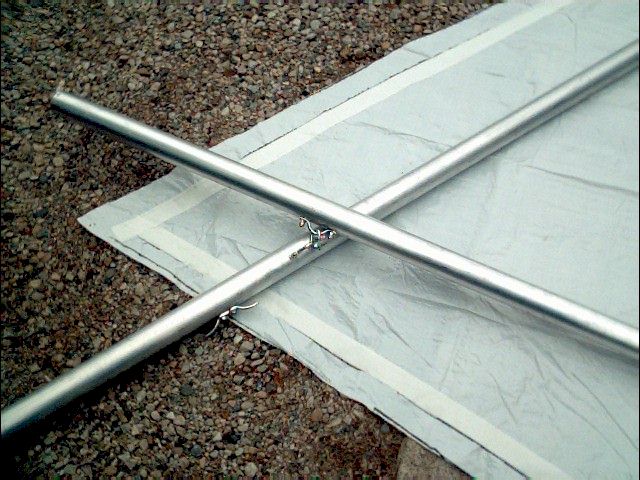
While I was taking pictures, I also took a
shot of my modified gooseneck that uses 2 rope loops and a shackle rather than eye-bolts.
This allows for easy disassembly.
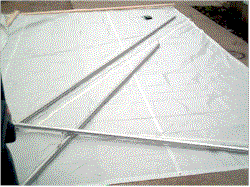
Later, I took the sail into the house and
laid it out there. I decided to cut off the material that had been under the spars
and fold the tape over onto the main area of the sail. The reason I did this was to
account for any stretch that the sail may have as well as to make sure that the lacing
will be tight. If I had followed my original plan, I think the sail would have ended
up being loose.
Mark the head, tack, and clew of the sail
so that I don't put it on upside down later, and mark off for grommets every 11".
Put grommets in. The tool I have is
shaped like a hinge and had no instructions. What I figured out (after ruining
several test grommets) was that I needed to first use the tool to punch a hole in the tarp
(use a hammer). Then, push the grommet through and put on the washer. Put this
back on the tool with the washer going first over the post on the tool. Whack away
at it with a hammer with the tool resting on a block of wood and shazam - grommet. |
2.5 |
|
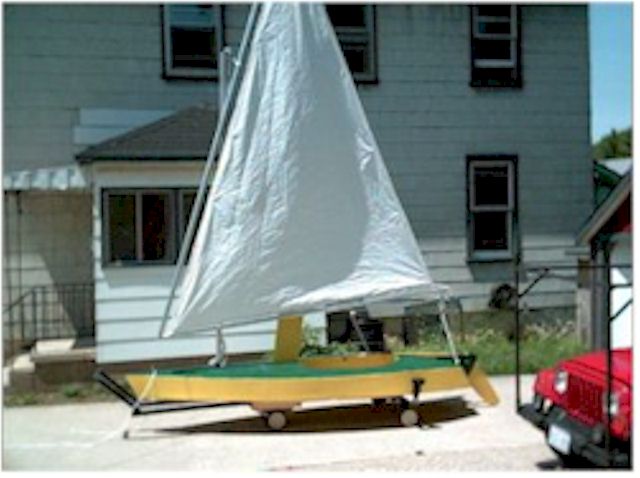
6-Jun-01
Painting |
No more rain! Put on the first coats of paint on the cockpit and
deck. It took surprisingly little non-skid grit (1 small container - about 500ml
size) to coat the surfaces. After sprinkling it on by hand I put a glove on and ran
my hand over the surface to assist it in bonding. |
1 |
|
| 8-Jun-01 |
Second coat of paint on
cockpit and deck. I noticed looking at the bow that it has a lean at the deck to
starbord by about 1" This isn't surprising considering the mistakes I made
attaching the bow frame and sides. |
1 |
|
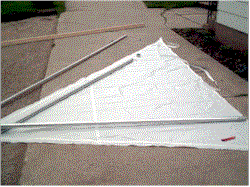
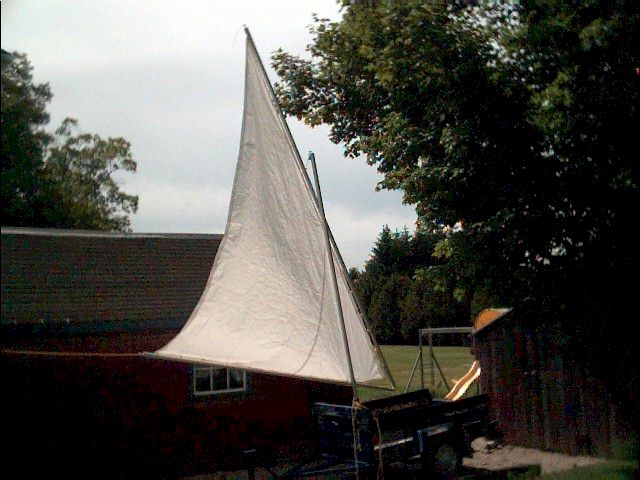
9-Jun-01
Finally Painted
Test Sail Lacing |
Third and hopefully final
coat of paint on the cockpit and deck. It turned out that I used almost exactly 1
quart of green paint so I have one left over. The gallon of yellow is about 3/4 gone
though. Probably mainly due to the extra coats on the hull. I also laced on my sail and hoisted it from my
utility trailer. Even though it seemed to work fairly well, I think I am going to
investigate using some sort of hoops. |
1 |
|
11-Jun-01
Highly Paid Engineering Help |
Attach the cockpit hardware
including my 3 deck plates and 2 rope loops for tying down my paddle and bailer. Work on attaching the tiller to the rudder. I
had a clever plan of using brass mending plates to attach them together. While this
was clever, it didn't work. Because the screws on opposite sides lined up to each
other, I split the wood on the tiller. Fortunately I didn't mess up the rudder so I
can go back to doing it as per the plans.
Work on attaching the rudder box.
After mounting the barrel bolts on the transom incorrectly, I switched them about.
I filled the screw holes I just made with 5 minute epoxy pushed in with a popsicle
stick. Attach the proper receivers for the barrel bolts to the rudder box and swear
because I put them 1/16" too close together. Saw off the top part of the lower
barrel bolt. Now the pieces "should" fit, but I can't slide the one bolt
in. Resolve to read the plans more before proceeding on this. |
1.5 |
|
| 12-Jun-01 |
Pick up a package of 14"
wire ties to use as sail ties at Home Depot. This isn't my first choice but should
be fairly cheap at about $1.50/rigging. |
|
31.83 |
13-Jun-01
Sail Tie Test |
Test the wire ties as sail
ties and cut main sheet and traveller. Rig and test main sheet blocks. It's
almost done now. |
1 |
|
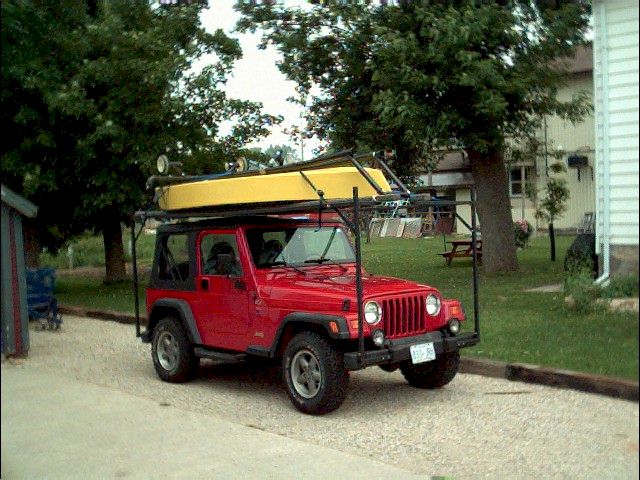
15-Jun-01 -
16-Jun-01
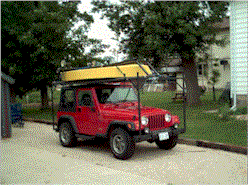
Heave Ho |
Loading - the saga Cover bunks made from 14' long 2X4s with scrap
outdoor carpet, and attach casters to one end. Attach these to the rack on my Jeep.
My first attempt to load the boat had only minimal success. I tried to load the boat
bow first up the back of the vehicle. Getting it close enough on the dolly proved
to be a challenge. Then I hoisted the bow up to the spare tire, tied it off and then
turned the boat over. Load the bow up on the bunks (sort of), then lift the stern
and shove the boat on. This didn't work that bad except for my mast tube getting
caught and the fore-deck got rather scraped up. I put the dolly on top though and
went for a cruise. The Jeep handled quite well with the load up there although there
was some serious wind noise from the dolly wheels.
Next, I tried my fancy unloading from the side ideas. This was a disaster and I
almost dropped the boat. At one point it was suspended from the rack by the bow eye
and one stern eye and was stuck. My helpful neighbour showed up at that time and
helped me get it down so there was no permanent damage.
After further thought and some helpful (and not so helpful) advice from a neighbour, I now
have my loading/unloading method to a state where I can comfortably do it without too much
damage to myself or the boat.
I turned my bunks around so that they are pointing to the front of the vehicle. I then
backed my dolly up to the front of the Jeep, lifted (with the help of rope to keep it from
falling down) the stern onto the casters on the bunks. I then tied the stern off to keep
it from falling off, lifted the bow and pushed it on. When lifting the stern, the bow
scraped a bit on the gravel, so I have to figure that bit out which should be minor and is
certainly a lot more minor than the deck scraping that I had.
To remove the boat, it was a bit of challenge to move it forward. I ended up dropping the
dagger-board and pulling forward on it. After lifting the boat up on the casters, it came
forward well. I tied off the stern to keep it from crashing down, then lowered the bow
onto the dolly. I think I may try to use some PVC pipe as a roller the next time. |
3 |
|
Total |
|
145.5 |
$1,556.47 |
