Date |
Event |
Time Used |
$$$ |
| 14-Mar-01 |
Work on fairing the deck to
the sides with a surform plane. |
.5 |
|
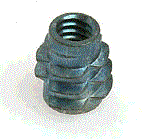
| 17-Mar-01 |
Another trip out to Welbeck Sawmill for bits and pieces. Barrel
bolts for the rudder, a couple of rope loops, a new blade for my surform plane, and a bow
eye and a threaded insert for it. The plans call for using a cabinet door handle for
the bow eye, but since I'm planning on Jeep-topping, I wanted something beefier. My
plan is to install the insert in the bow with epoxy and then screw the eye into it.
This should be stronger than just something screwed in. |
|
14.31 |
| 18-Mar-01 |
Work on fairing the hull to
the sides with a surform plane. Also knock off the epoxy drips etc that had
accumulated. |
.5 |
|
| 22-Mar-01 |
Pick up boom and spar from Metal Supemarkets |
|
86.85 |
| 23-Mar-01 |
Sanding. |
.5 |
|
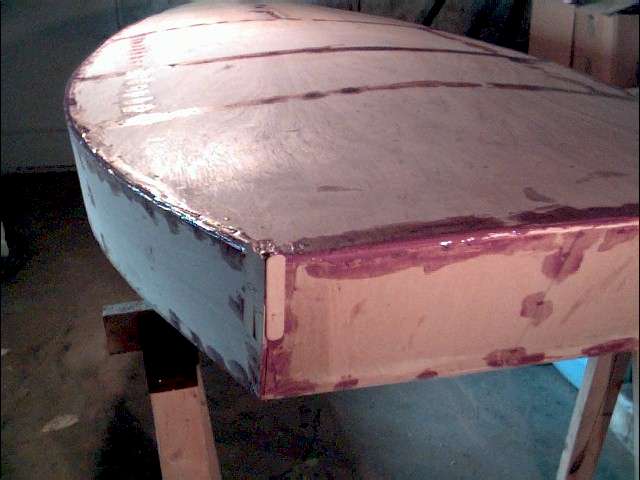
24-Mar-01
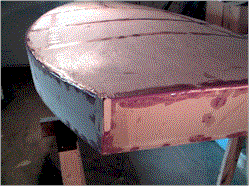
Filling Form |
Fill screw holes and groove
between hull panels. Scrape out the groove first to allow for filling. Use
stapled popsicle sticks to make a form to hold the thickened epoxy up on the corners of
the hull at the transom where material had been gouged away. I'll remove and sand
them off when the epoxy sets up. |
1.5 |
|
| 27-Mar-01 |
Pick up some small brass
plates to use to join the tiller to the rudder at Home Depot. |
|
3.35 |
| 28-Mar-01 |
While at a trade show in
Toronto, track down Noah's Marine and pick up
some supplies. I also picked up a copy of Phil Bolger's book 103 Sailing Rigs |
|
|
| 50 yard roll of
3" fiberglass tape |
|
46.00 |
| 1 Quart
MicroBalloons |
|
7.76 |
| 30-Mar-01 |
Fill edges and gouges with
epoxy thickened with microballoons and fairing filler. |
1 |
|
| 31-Mar-01 |
Sanding and pick up a bolt to
use as a rudder pivot at Welbeck Sawmill |
1.5 |
.31 |
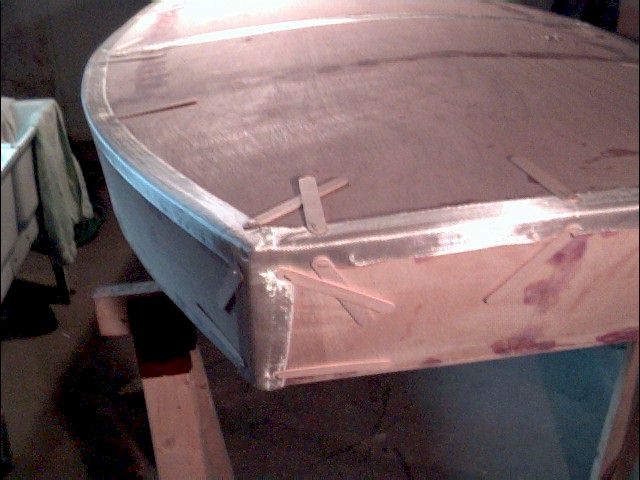
1-Apr-01
More Popsicle Sticks |
Put in place fiberglass tape
on the hull/side joins, as well as along the centre line of the boat from the bow to over
the daggerboard slot. Use staples through popsicle sticks to hold everything in
place. I plan to remove these when the first coat of epoxy sets up. |
.75 |
|
| 6-Apr-01 -
Lunch |
My first adventure with
coating "string and snot" during an extra-long lunch. Some things I
learned - don't rely on a brush for wetting out. It will pull up the tape from the
boat and will also shred the ends of the tape. Fortunately, I figured this out
fairly quickly and switched to a plastic squeege except where the tape was up-side-down
(transom). The squeege also worked well to scrape up drips, or where the epoxy had
gotten thick under the tape. The popsicle sticks worked just fine and I removed them
as I worked along. The epoxy seemed to hold the tape in place once it wetted out,
then I could also wet out where the sticks were.
A hint that I heard from someone was to use stips of plastic from a milk jug etc rather
than popsicle sticks. This would be good for a larger piece as you could leave them
in until the the epoxy was almost dry as the epoxy won't stick to the plastic. |
1.75 |
|
| 6-Apr-01 -
p.m. |
Use epoxy thickened with
MicroBalloons to fill the weave in the tape and to feather the edges. I only did the
hull bottom as I was worried about sags. |
.75 |
|
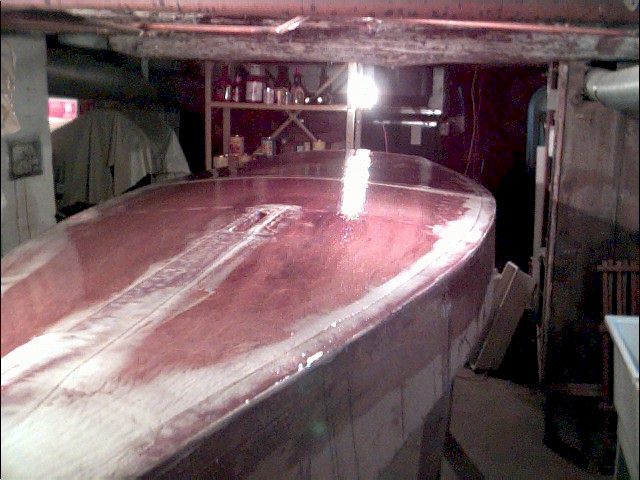
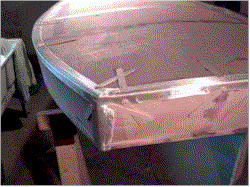
7-Apr-01
Ain't she purty |
a.m. - Start out to sand the
tape, but switch to using a dull surform plane to get the microbaloons sanded mostly fair.
The sanding did not work well mostly because of the fact that the epoxy/microballoons mix
was still somewhat tacky. Then apply the first coat of epoxy to the entire hull.
p.m. - Add the second coat of epoxy. - done the second gallon of resin. Add the
third coat before bed. |
2.25 |
|
| 8-Apr-01 |
Flip the boat over and use my
dull surform plane to knock off the drips etc. Spend some time cleaning tools to get
ready to start filling holes in the deck. |
.50 |
|
| 11-Apr-01 |
Another trip out to Welbeck Sawmill for fairing filler. |
|
18.96 |
| 13-Apr-01 |
Fill screw holes and gaps
with thickened epoxy. Mix in sawdust into some epoxy as a test to fill a large gap
where the aft port deck meets the side. I made sure that it was below the finish
level, then filled with regular fairing filler thickened epoxy. |
1 |
|
| 14-Apr-01 |
Sanding and filling.
Filling and sanding. Actually I used a surform plane with a dull blade for the
sanding - much faster at taking off the high spots.
Pick up two more rollers at Pro Hardware |
1 |
4.80 |
| 15-Apr-01 |
Sand some more. Put on
fiberglass tape - using popsicle sticks again to hold it it place. Also put tape
around part of the cockpit opening. The tape didn't easily conform to the curve on
the aft end of the cockpit so I didn't tape it. Taping the forward part was a bit of
over-kill anyway probably, but I was worried about the extra blocks I had added
delaminating. |
2 |
|
| 16-Apr-01 |
Fill weave of fiberglass with
thickened epoxy. |
1.25 |
|
| 18-Apr-01 |
Use my dull surform plane and
a palm sander to sand. |
1 |
|
| 20-Apr-01 |
First coat of epoxy on deck
and sides. |
0.5 |
|
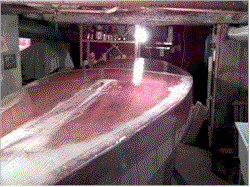
| 21-Apr-01 |
Second coat of epoxy on deck
and sides, and with the help of my son Trueman (6) and daughter Emma (8), apply the third
coat and tip off - Kids doing the tipping off on the sides. |
1 |
|
| 22-Apr-01 |
Add a fourth thin coat of
epoxy to the deck and sides. There were some spots where I could still feel the
grain of the wood. |
.5 |
|
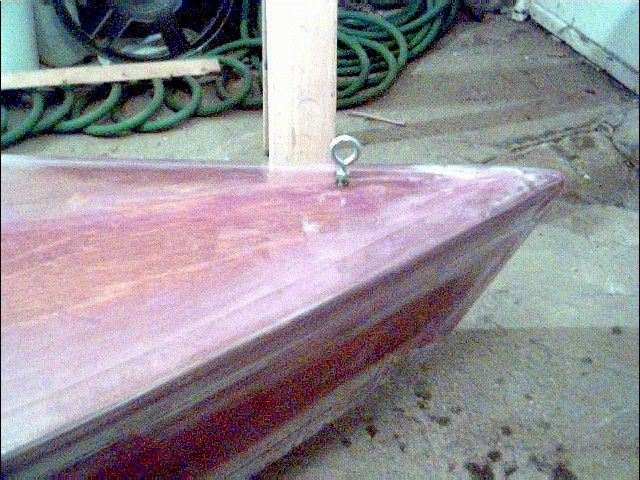
23-Apr-01
Bow Eye Installation |
Drill a hole in the bow for
the bow eye insert. Screw in the insert, fill the hole with unthickened epoxy and
then insert the bolt. While the epoxy set up, I'll loosen and tighten the bolt to
keep the epoxy from sticking to it. |
.25 |
|
| 24-Apr-01 |
Make a trip out to Canadian
Tire for some more supplies - 2 paint rollers and some carpet tape for the sail.
Also, add a strip of fiberglass tape along the bow over the bow eye for strength.
The wood had cracked here during installing the hull and was showing around the bow eye. |
.5 |
17.22 |
| 25-Apr-01 |
Pop out to Welbeck Sawmill for inserts and eyes for the aft
end. I decided to use these rather than the handles the plan calls for because of
the superior strenght I should get. For lifiting, I can use a short length of line.
Try to remember to take my wallet next time <g>.
Install the aft bow eyes and work on fairing the bow tape added on the 24th. Later
in the day fill screw holes and fillet in part of the cockpit. |
1.5 |
2.28 |
| 27-Apr-01 |
Sand the inside of the
cockpit and finish filleting. |
2 |
|
| 28-Apr-01 |
Pick up hardware at Welbeck
Sawmill and Canadian Tire for running rigging and paint. Also, more gloves (latex -
I haven't liked them - I preferred the vinyl) and rollers to finish the epoxy work in the
cockpit. Apply the first coat of epoxy to the inside of the cockpit. |
.5 |
|
| Latex gloves and rollers. |
|
12.97 |
| Running rigging - blocks etc
to attach them. |
|
38.23 |
| Paint - 1 Gallon Yellow, 2
Quarts Green. |
|
72.75 |
| 29-Apr-01 |
Apply second coat of epoxy to
the inside of the cockpit. |
.5 |
|
| 1-May-01 -
4-May-01 |
Use a surform to remove high
spots and drips in the epoxy. |
1 |
|