|
| |
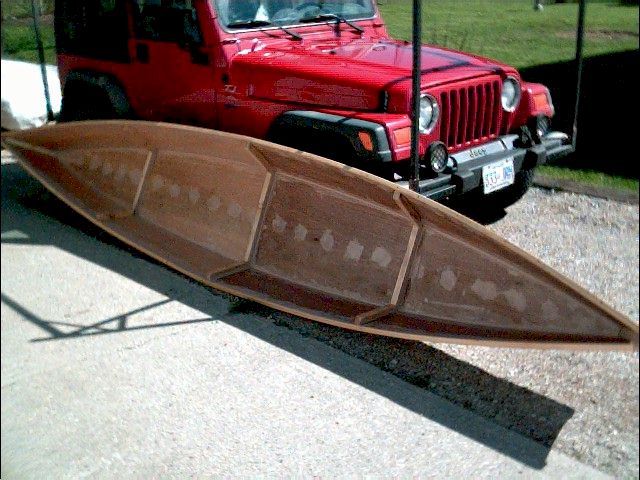
In order to enjoy the Saugeen River that flows
near my home, I've decided to build a variation of the bateau.com
Cheap Canoe. I strongly
encourage anyone who is thinking of building this boat to check out their web site as well
as their stitch and glue primer.
Of course I can't leave well enough alone and stretched the design out to 14'
8" by changing the station lines to 14 3/4" from 12" to get the absolute
most boat out of 2 sheets of plywood. I also widened the beam at the spreader points
indicated by 2" to create more rocker and am building the boat using external chines,
3 frames, and solid stem pieces. This modification has not been approved by
the designer - if you choose to build according to these dimensions, you are as
much on your own as I am. mind you, it does look like it made a pretty nice hull.
With the permission of bateau.com I have saved my
CAD drawings for the reference of others.
- Stem profile pdf file Turbo Cad
- Panel Layout and Frame Layout pdf
file Turbo Cad
Please note the bottom panels are drawn as if the boat were being
built stitch & glue or with internal chine logs. I built using external chine
logs but the drawings worked well for my paper and tape models. The actual size of
your hull bottom may vary so do not cut it out in advance. I
recommend drawing a centre line down the plywood and aligning it to the centre of the stem
pieces and frames. Trace the outside and you'll have a mostly perfectly fitting hull
bottom.
Construction Log
Date |
Event |
Time Used |
| 23-Mar-02 |
Rip out 1
1/2" pieces from spruce 2X4s. Then, laying out the dimensions of the frames on
a scrap piece of board, determine where to cut lap joints to join the pieces
together. The forward and aft frames have had their sides beveled to match the angle
of the side at that point. Another lesson that I learned from my One Sheet
Skiff. Fasten the frame pieces using PL Premium construction adhesive. Cut the stem pieces out of another 2X4 according to
the dimensions on my modified drawings. This stem is a bit different than what I
used on my first One Sheet Skiff. In order to avoid problems with sealing the
plywood, I've recessed the sides of the stem to inset the side panels. The resulting
shape is much like a Christmas tree. If this works well, I do the same thing for the
next OSS that I want to build for auction. |
2.5 |
| 27-Mar-02 |
At lunch - gotta
love working from home - lay out and cut out the sides. Make sure to draw a centre
line on the panels and to have the same colour up on the wood. Interestingly, my
assembly area is just a touch over 16 feet long which is whay I needed for this. I
made the sides slightly shorter than the drawings, allowing for the solid wood part of the
stem that will extend beyond the plywood sides. |
1.5 |
| 27-Mar-02 |
Before and after
supper, attach the stem pieces to the sides. Unfortunately, my lack of patience has
hurt me again. With the long stem piece attached to one set of sides, I turned the
assembly on it's side and tried to saw off the excess. The vibration and stress
pulled the side off the stem leaving the screws embedded in the stem and glue
everywhere. Using a hammer, I flattened the damaged plywood down, re-applied more
glue and after cutting off the excess stem I re-attached the side using
several extra screws. I believe that I will end up having to paint that part of the
boat at least - it looks a mess. |
1.5 |
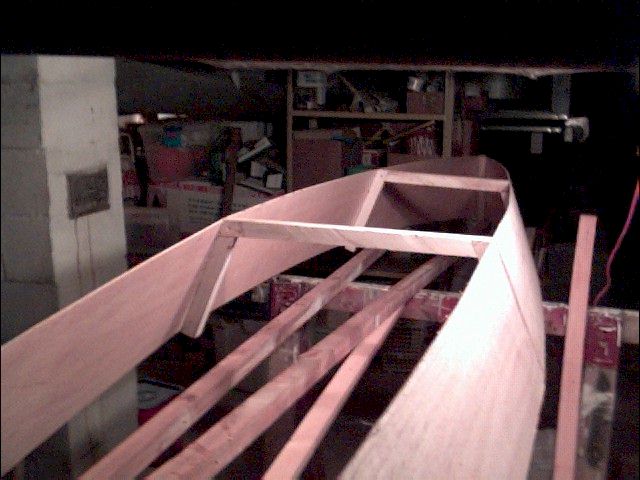
| 30-Mar-02 |
Using PL Premium,
assemble the sides to the frames. This actually went pretty smoothly and made the
hole unit a lot stiffer..
I think something's missing |
1 |
| 1-Apr-02 |
Rip 4 - 1X
5/8" pieces from a 2X4, bevel them to the angle required and scarf them together to
make 2 16' long chine logs. This is my first attempt at a scarf joint. I
milled the angle using my stationary belt sander and glued them using PL Premium.
We'll see how they turn out in a couple of days. |
1.5 |
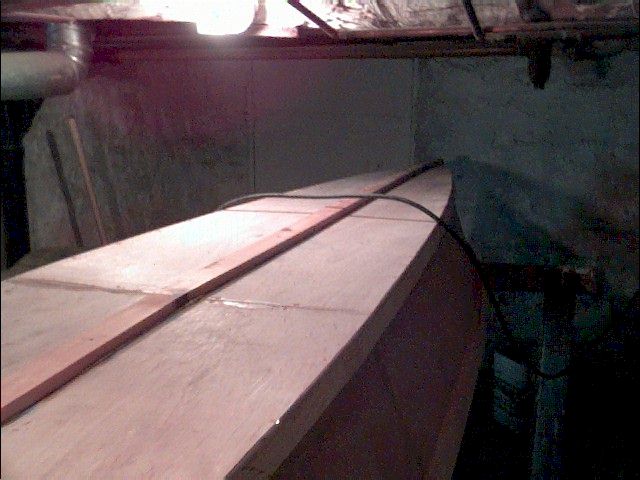
| 3-Apr-02 |
Attach the chine
logs to the sides of the boat using PL Premium and 3/4" galvanised screws. I
put the screws in about every 10" or so. |
1.5 |
| 5-Apr-02 |
Fair the chine
logs and sides, lay the bottom on using the centre line to align it and finishing nails to
hold it in place. Scribe the actual size of the bottom pieces, cut them out and
fasten them with PL Premium and screws. |
2.5 |
| 6-Apr-02 |
Spend some time
fairing the chines using my surform shaper. |
1.5 |
| 7-Apr-02 |
New blades for
the surform shaper |
|
| 10-Apr-02 |
Cut out sheer
clamps out of 2 spruce 2X4s and bevel the ends for scarfing. |
1.5 |
| 11-Apr-02 |
Install sheer
clamps. Note to self glue scarf joints first on bent pieces, don't trust
that they'll fit with clamping. |
2 |
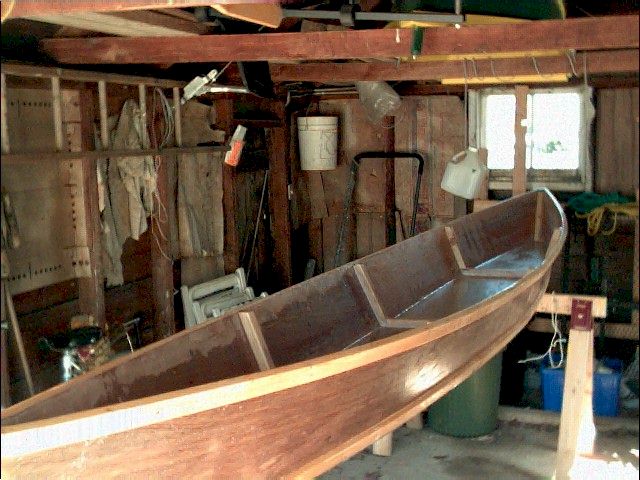
| 12-Apr-02 |
Install keel -
use some scrap 1X2 fir left over from renovating the living room. Since the piece
wasn't quite long enough, I but-jointed to get the complete length. The bulk of
construction is now complete. On to the fairing and filling.
It's a boat! |
1.5 |
| 14-Apr-02 |
Fill the screw
holes and fillet the inside of the chines with auto-body putty. |
4 |
| 19-Apr-02 |
Sand the hull,
fill the screw-holes on the sides with epoxy thickened with wood flour (sanding dust) and
coat the bottom of the hull with epoxy. |
2 |
| 8-May-02 |
Coat one side of
the outside of the hull with epoxy. |
1 |
| 9-May-02 |
Coat the other
side of the outside of the hull with epoxy. |
1 |
| 10-May-02 |
Coat the inside
of the hull with epoxy.
Note: To do the inside I tried something different. For the outside, I
used foam brushes and threw them away after they shredded. I ended up with lots of
little bits of foam brush embedded in the coating. On the inside, I used a brush to
do the inside corners, not worrying too much about drips, just putting it on thick.
Then I poured epoxy onto the surface and used an auto-body filler squeegee to spread it up
the sides and along the bottom. I think I ended up with a smoother coating with less
sags and drips and used less epoxy than I would have otherwise. |
1.5 |
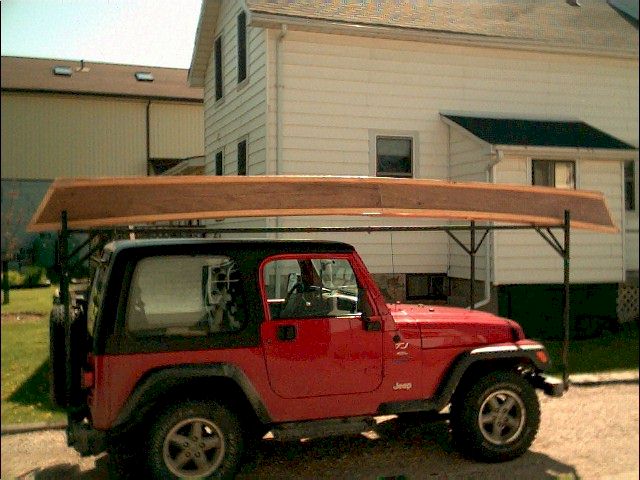
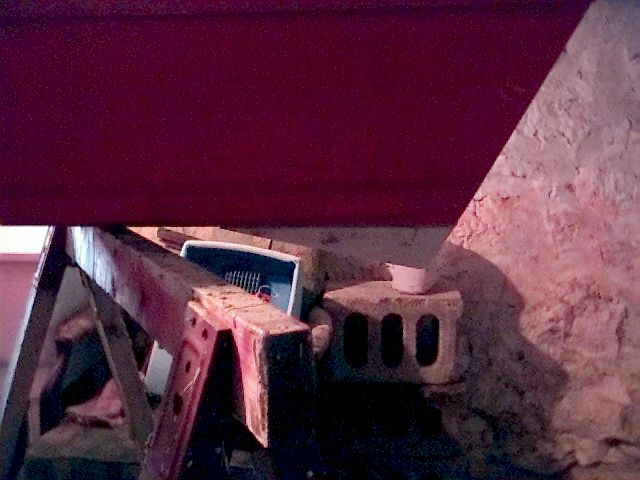
| 11-May-02 |
Carry the pirogue
outside and store it in the garage for the 3 weeks for the epoxy to finish curing and
blush. Use a surform plane to knock off drips that were created from
over-enthusiastic epoxying of the sheer clamp. |
.5 |
|
|
| 29-May-02 |
Sanding the
outside of the hull |
1 |
| 31-May-02 |
Sand the inside
of the hull and prime. |
2 |
| 2-Jun-02 |
Lightly sand the
primer and paint the outside of the hull. |
2 |
| 3-Jun-02
- 7-Jun-02 |
More painting |
3 |
| 15-Jun-02 |
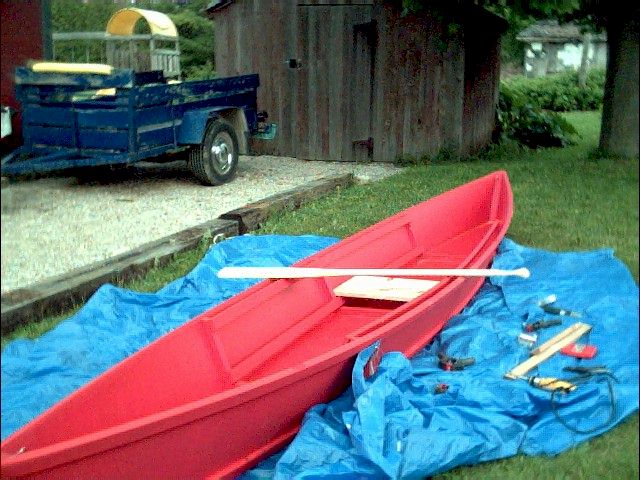
Add the internal
rails for holding the seat and cut a seat out of a 12" pine board. |
2 |
|
|
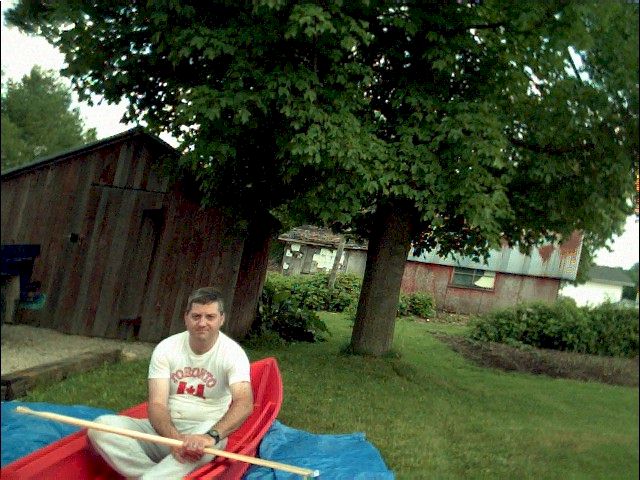
| 27-Jun-02 |
Finally
launched. Take the pirogue down to Laurel Creek Conservation
Authority in Waterloo. Unfortunately, being alone, I was unable to take any
pictures of the boat under weigh. The lake is fairly shallow with lots of weed beds
so it seemed like an ideal place for this design. The low seat that I installed
worked well. I didn't feel any need for a back rest for the 1 1/2 hour or so that I
was out. A stiff breeze caused the aft end of the boat to be blown about which made
for some tricky navigation.
At 230lbs, I'm probably the maximum size for this design and it did feel a bit
"tippy" but after all, it's a canoe. I paddled from one end of the lake to
the other and back and other than getting a bit tired - it's been 25 years since I've been
in a canoe - things were fine. When I got back to the dock, I did some stability
tests. I found that I could heel the canoe over to the gunwales and it stayed pretty
stable. In fact, it took a bit of effort to get it that far. I think it will
work out just fine.
Ready for launch |
| |
TOTAL |
37 |

|
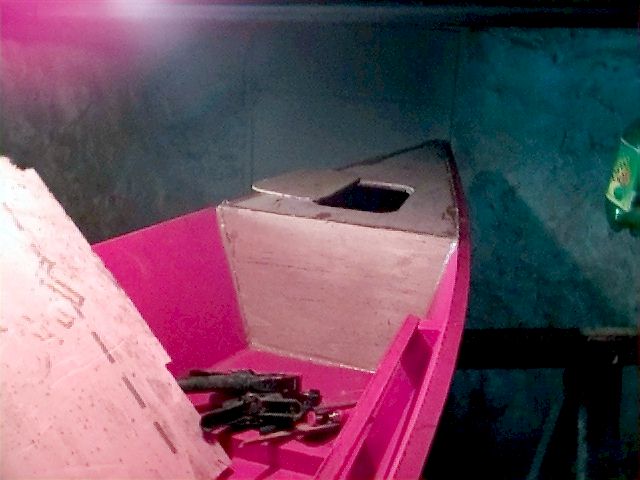
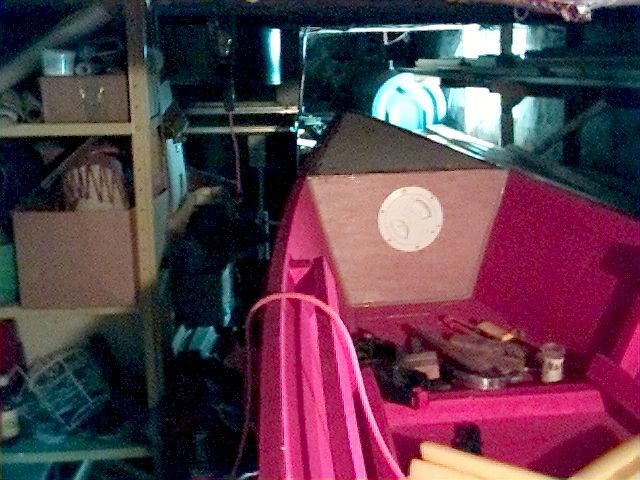
Over the winter of 2002/2003 I did some
modifications to improve the performance and safety of the pirogue. I added a small
skeg about 3" deep to improve tracking, and added fore and aft floatation chambers.
The size of the chambers was determined by the availability of scrap lumber to
build them. I used PL Premium to glue thin stringers along the top of the sides
1/4" down from the top of the gunwales. To make sure of this, I clamped a piece
of 1/4" plywood to a metre-stick and used that as a guide to position the stringers.
A 1/2" square piece of wood was used to beef up the joint where the deck meets
the bulkhead. The bulkhead is just glued in place to the sides and glued and nailed
with finishing nails to the deck stringer. The deck is held on with glue and
finishing nails. The chambers are sealed using polyester resin and will be painted.
The forward deck plate is waterproof making for a handy place to store my wallet
etc. The aft deck plate is made out of plywood following these steps:
 | Measure out the size of hatch covering you
want. An tapered hatch was picked to make it easier to know which way it is supposed
to be placed. |
| To make the curves on the corners, a handy
plastic tub was used to mark the radius. |
| With my jig saw angled up, I turned it on
and then slowly tilted it into the wood to make a smooth cut without having to pre-drill a
hole. |
| Once the hatch cover is removed, I found a
piece of scrap slightly larger then the hatch cover. Placing the hatch on the
scrap, I used my compass to mark a line 1/2" out from the sides of the hatch as well
as around the hatch itself. Then removing the hatch and placing the deck piece on
the scrap, I was able to mark out 1/2" inside the hatch opening. This gave me a
1" wide backer plate that will support the hatch. |
To fasten the hatch, it is my intention to
put a screw eye in the hull in the centre. A bungee will stretch up from there
through a hole in the centre of the deck plate. A string clip like the ones used on
jackets will be used to put a stopper below the hatch. Another stopper will be above
the hatch. To remove the hatch, just lift up on the bungee, retrieve your frosty
beverage and then snap the hatch back in place. To loosen the hatch, move the upper
stopper. I plan to use standard foam tape weatherstripping to seal the opening. |
2.5 |
| Date |
Location |
Crew |
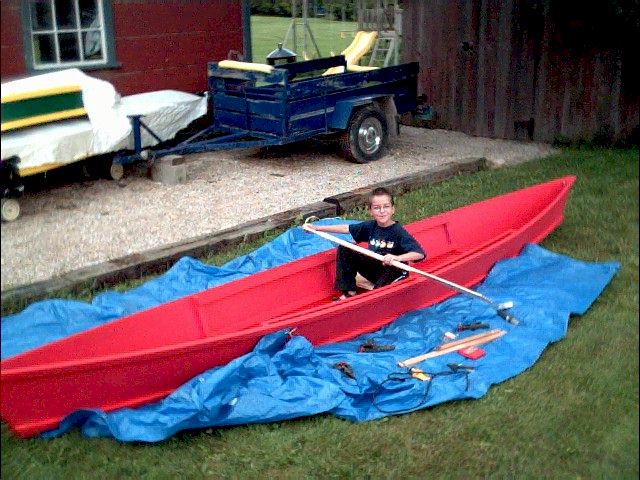
| July 14, 2002 |
Connestoga Lake |
Trueman - aged 7 |
What a great day for a paddle. Trueman and I went out
to the lake for our first father/son paddle. I didn't have a forward seat built at
this point, so he ended up sitting on an old drywall mud/bailing bucket which worked quite
well. He used the short paddle that I keep as an emergency paddle on the MiniCup
with pretty good effectiveness given that this is his first time ever in a canoe.
The lake was well populated by power boaters and PWC users as expected and the canoe
handled the wakes quite well. My version has a fair bit of rocker so I think that
helped quite a bit. There were only two times that the waves came in over the bow
and while we were bobbing around quite a bit, we felt pretty safe.
The only down side is that when we got home, I noticed a crack in the centre frame piece.
I opened it a bit and tried to push in some 5 minute epoxy and then put a screw in
to hold it closed. This piece shouldn't be very structural anyway, but it never
hurts to keep things in repair. I also added some bottom supports to the seat and
built a second seat. The seats will now sit on the hull bottom rather than the side
rails. |
| Date |
Location |
Crew |
| July 23, 2002 |
Port Elgin |
Trueman - aged 7, Emma - aged 10, Katherine - aged more than 19 |
One of the (few) advantages of working for yourself is that
when things are slow, you can occasionally play hookey and take off.
With high humdex readings and nothing to do in the office, my wife Katherine suggested
that we take off for the beach for the afternoon. Quickly after that, I had the
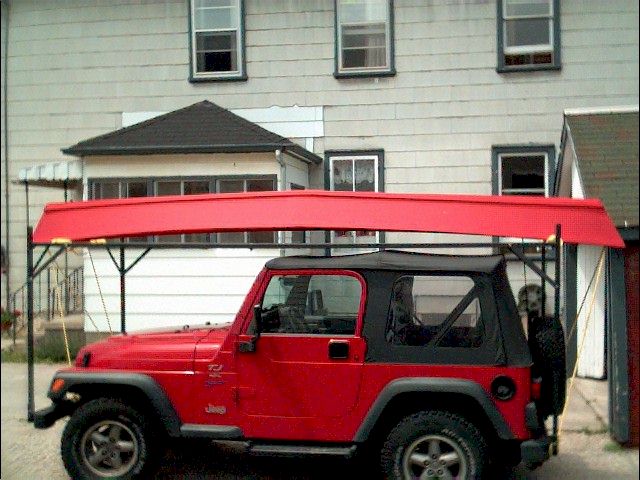
pirogue on the top of the jeep, the external trunk for the Jeep mounted and loaded
with beach stuff, plus PFDs, paddles, and the inflatable row-boat.
A fairly quick drive in high winds got us to Port
Elgin and the beach. Eventually everyone else was set up and I could take the
pirogue out onto the lake. For a flat bottomed boat that is supposed to only be used
on calm water, it was a hoot out in 2' + swells on the lake. Katherine tried it out
but found it awkward for her to paddle and my daughter Emma wasn't too comfortable with
how the boat would bounce around on the waves especially when they would hit us on the
beam or when they would wash over the bow. My son Trueman on the other hand had
quite a good time. We even did some - ahem - stability tests. We found that
Trueman - about 50lbs - could stand up in the bow and jump off into the lake without
causing the boat to even come close to tipping over. I was also able to pull him
back on board although we came close to capsizing with that. I also did an
intentional capsize. In order to do that, I ended up having to lean quite far over
until the gunwales were awash. Once water started coming in over the gunwales, the
boat went down quickly. With the boat full of water and me in it, water covered the
gunwales which means that it would not be possible to self-rescue in deep water without
additional floatation in the boat. Once I dumped the water out I was able to fairly
easily get back in standing in about 3 feet of water though.
I also did a fairly long paddle along the coastline for about an hour. The boat
handled well and it was quite neat to be able to see bottom down 10' + below me. I
have determined though that for a longer paddle, I will need a padded seat or firmer hind
end.
Over-all, an excellent day out. It was amazing the amount of attention and
favourable comments I recieved on my little home-made plywood boat though. I am very
please with how it handles rough water and am looking forward to getting it out on the
river soon. |
| Since July 24rd, I have taken the pirogue out in a variety of
locations and conditions and it has performed quite well. I am planning on adding
sealed floatation to it and a skeg to improve tracking, but am quite happy with the craft. |

2009 Update
Well after sitting outside - mostly under a tarp or plastic sheet, suffering from tree
fungus in 2007 and being poorly repaired, the time has come to say goodbye.
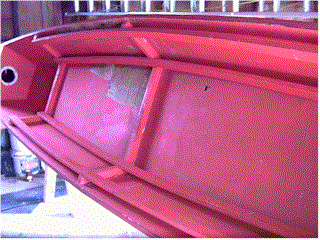
The delamination in 2007 that was poorly fixed then has gotten worse. After
spending the part of a Saturday repairing the bottom only to turn the boat over to fine
the inside badly delaminated too, the choice was made to put it on the side of the road
with a sign saying "Free". It took about 15 minutes for someone to stop
and take it off to it's new life as a flower bed. I suppose if I had kept the boat
under cover more and kept up on maintenance better it would have lasted. Another
small can of Bondo and a bit of work would have made it usable again, but with everything
else that's been happening I haven't used it in 2 years so I think the right choice was to
let it go.
 |
 |
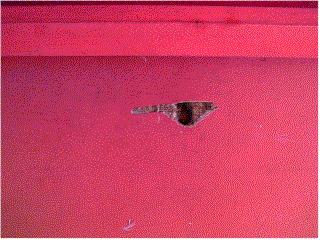 |
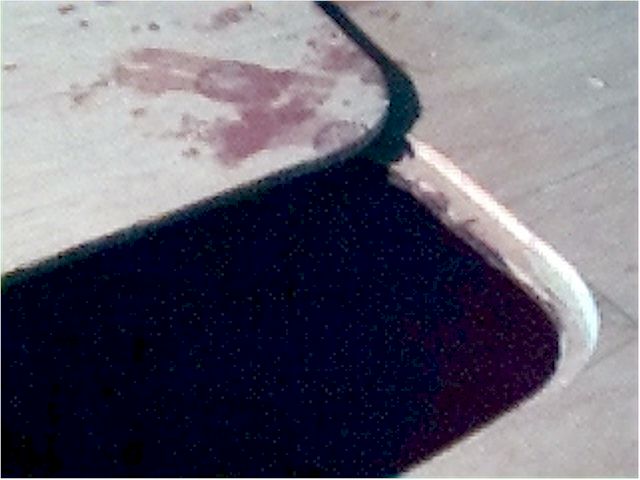
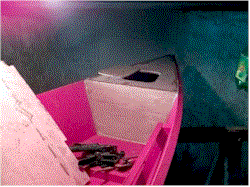
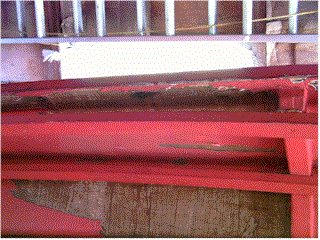
| This hull delamination is below similar delamination on the bottom |
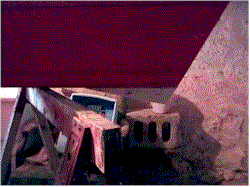
The rot goes all the way up the side. There's probably 2 veneers of original
wood left. |
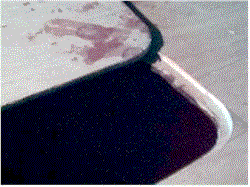
Un unrelated problem - the crack that was here came free to show a void in the
original plywood. |
|